It’s Almost That Time of Year!

How Can That Be?
Is it possible that in just a few weeks we’ll be in full shopping and celebratory mode for another Holiday Season?  Well it doesn’t seem possible but it is reality for sure.  The few weeks that we have left to prepare for Thanksgiving are short and before you know it Christmas rolls around so fast that we don’t know what hit us. Let’s approach this Holiday Season with Tidings of Comfort and Joy! 
That’s what this sweet card is telling us.  Is there someone you’d like to give a small gift to or show your gratitude for during this busy time?  Well this is the perfect card for that.  It’s really very easy to make and looks like you put your whole heart into it.
As I’ve been telling you in my prior posts, the Christmas Pines along with the Pretty Pines Thinlits dies make for yet again a pretty card.  I had to do another one just to let you see how versatile this set is.  I like how it’s a little subdued with neutral colors but yet pops with the beautiful gross grain ribbon.
Here’s how to make this fun card:
Stamp Set:
  1. Christmas Pines
  2. Thinlits Dies (Pretty Pines)
Supplies:
  1. Crumb Cake cardstock
  2. Warmth & Cheer DSP Stack
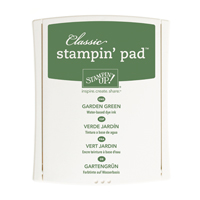
  3. Garden Green ink pad
  4. Very Vanilla cardstock
  5. Garden Green cardstock (scrap)
  6. Cherry Cobbler cardstock (scrap)
  7. Old Olive cardstock (scrap)
  8. Chocolate Chip cardstock (scrap)
Accessories:
  1. Delightful Dijon from 3/8″ Ribbon Trio Pack
Assembly Instructions:
Crumb Cake card base is 5-1/2″ x 4-1/4″, Very Vanilla is 5-1/4″ x 4″, Plaid paper is 5-1/2″ x 3-1/4″, Crumb Cake small piece is  2-3/8″ x 2-7/8″, Very Vanilla cardstock (for greeting) is 2-1/4″ x 2-3/4.  Cut out pine branches out of Old Olive, Garden Green and Delightful Dijon paper along with holly berries out of Cherry Cobbler paper.  Layer all papers and attach pine branches along with holly berries.  Add ribbon before mounting greeting.  Add your special touch with a bow made from Delightful Dijon ribbon. 
PRODUCT LIST:
WHAT’S GOING ON?
  • NOVEMBER WORKSHOP: Saturday November 19, 2016 12pm to 4pm
Thanksgiving themed projects and Tin of Tags (see Holiday Catalog below pg. 33)
LAST WORKSHOP OF 2016
Reserve your spot today! Details of projects to follow by 11/4/16
  • Check out the Paper Pumpkin monthly kit – subscribe today – click here: PAPER PUMPKIN
  • Click below to view the 2016 HOLIDAY CATALOG:


http://su-media.s3.amazonaws.com/media/catalogs/2016%20Holiday%20Catalog/Holiday16_en-US.pdf


On my online store!  Annabelle

October 2016 Paper Pumpkin Kit and Alternatives

October 2016 Paper Pumpkin Alternatives
It’s was so easy to create this simple and clean line alternative to October 2016’s Paper Pumpkin.  Sometimes less is more


Here’s another example of an alternative card using some ink with daubers to color the leaves and give it a geometric feel.  I made good use of the negative pieces to create something very light and airy as the leaves themselves.
Here is the original October 2016 Paper Pumpkin kit with a card made as the instructions stated.  I love it as well but I had to try and think outside the “Red/Orange box” if you know what I mean.  I love the sequins in this shaker card.  They are 3 different sizes.  Who doesn’t love a shaker card?


WHAT’S GOING ON?


OCTOBER WORKSHOP: Saturday, OCTOBER 29, 2016 12 Noon to 4 p.m.


  • Check out the Paper Pumpkin monthly kit – subscribe today – click here: PAPER PUMPKIN
  • Click below to view the 2016 HOLIDAY CATALOG:


http://su-media.s3.amazonaws.com/media/catalogs/2016%20Holiday%20Catalog/Holiday16_en-US.pdf

ORDER ONLINE 24/7
On my online store!  Annabelle

Know Someone With A Halloween Birthday?

COOKIE CUTTER BIRTHDAY???
 
Know someone with a Halloween Birthday?  I have a great-nephew whose birthday falls on Halloween and I made this card for him.  Super easy and can be made with a variety of different Halloween color combinations!


Stamp Sets:
  • Cookie Cutter Halloween
  • Spooky Fun
  • Birthday Banners
Supplies:
  • Pumpkin Pie Cardstock
  • Halloween Nights DSP (substitute)
  • Halloween Nights Baker’s Twine (substitute)
  • Black Archival Ink Pad
  • Pumpkin Pie Stampin’ Write Marker
  • Crushed Curry Stampin’ Write Marker
  • Smoky Slate Stampin’ Write Marker
Card Assembly:
 
Card Base = 8-1/2″ x 11″ scored and folded
DSP bottom piece = 2-3/4″ x 5-1/2″
DSP top piece = 2″ x 5-1/2″
 
Stamp and color 3 cookie cutter stamp images. Tie bow with Baker’s twine and mount 3 stamped images in center of the card base.
 
Inside of card: Stamp spider and web in top left corner and greeting in center.
Super Cute!!!
 

Product List


WHAT’S GOING ON?


OCTOBER WORKSHOP: Saturday, OCTOBER 29, 2016 12 Noon to 4 p.m.


  • Check out the Paper Pumpkin monthly kit – subscribe today – click here: PAPER PUMPKIN
  • Click below to SHOP the 2016 HOLIDAY CATALOG:


http://su-media.s3.amazonaws.com/media/catalogs/2016%20Holiday%20Catalog/Holiday16_en-US.pdf

Spooky Fun Cute and Easy Halloween Card

 
Spooky Fun Halloween Card


Look how cute this Halloween card is! I’m going to show you how
easy it is to make.  You’ll be surprised at the simplicity of it and yet
it has a little bling with the Glimmer Paper and Wink of Stella.

Supplies:

1) Card Base = 10″ x 6.5″ Black Cardstock (scored and folded)
2) 3″ strip of black cardstock (for tree cut out)
3) 6.5″ x 2.5″ Delightful Dijon cardstock for background
4) 3″ x 4″ Pumpkin Pie Glimmer Paper
5) 2-1/2″ Circle Punch
6) Smokey Slate Stampin’ Write Marker
7) Crushed Curry Stampn’ Write Marker
8) Cookie Cutter Builder Punch
9) Halloween Scenes Edgelits Dies
10) Very Vanilla cardstock
11) Dimensionals
12) Black thread
13) Wink of Stella
14) Big Shot

Basic Instructions for card assembly:

Score and fold 10″ side of card in half.  Take the 3″ strip of Delightful Dijon cardstock and rip about 1/2″ off of the long end.  Make sure it’s uneven so as to give the look of hills.  Glue to card.  Take 3″ strip of black cardstock and cut out the tree with from the Halloween Scenes Edgelits Dies.  Take the 2-1/2 circle punch and punch out the moon from the Pumpkin Pie Glimmer Paper.  Attach moon just at the horizon with dimentionals.  Attach the tree 1/2 way between the moon and the background with adhesive. Cut out the witch, and the tombstones with the edgeless dies with their respective paper.  Color in the tombstones with Smokey Slate Stampin’ Write Pen.  Punch out the skeleton with the Cookie Cutter Builder punch out of the Very Vanilla paper and the bow tie out of the glimmer paper.  Color in the eyes with the Crushed Curry pen and the edges of the bones with the Smokey Slate pen. Use Wink of Stella on the skeleton’s face (and body if you’d like). Attach the tombstones and skeleton with dimensionals.  Finally take some black thread and wrap a few times around 4 fingers.  Attach to the back of the witch with dimentionsals and attach to the card.

That’s it!  You’re done.

Envelope:

I used the Envelope Punch Board to make the envelope with Delightful Dijon Envelope Paper.  Follow the instructions on how to use the envelope punch board that come with it.  You will need the following size paper for the envelope:

9-1/4″ x 9-1/4″ Delightful Dijon Envelope Paper
Line it up on #4 Score line, punch and turn.

I love the way this card looks with the custom envelope!


Click on any of the products to order in my Online Stampin’ Up! Store


Product List

Big Shot

$110.00

WHAT’S HAPPENING NOW:

OCTOBER WORKSHOP: Saturday, OCTOBER 29, 2016 12 Noon to 4 p.m.

  • Check out the Paper Pumpkin monthly kit – subscribe today – click here: PAPER PUMPKIN
  • Click below to SHOP the 2016 HOLIDAY CATALOG:
http://su-media.s3.amazonaws.com/media/catalogs/2016%20Holiday%20Catalog/Holiday16_en-US.pdf


Christmas Pines

Christmas Pines
Who doesn’t love a beautiful Christmas Card? Using the beautiful Christmas Pines stamp set from Stampin’ Up! the Thinlits Dies and the Textured Impressions Embossing Folder, you can make these simple but elegant Christmas cards in a snap.


Product List:
1) Christmas Pines Stamp Set
2) Warmth & Cheer DSP Stack
3) Pretty Pines Thinlits Dies
4) Pine Bough TIEF
5) Baker’s Twine Trio Pack
6) Mini Pinecones
7) Mini Jingle Bells 
8) Cherry Cobbler Ink Pad
9) Garden Green Ink Pad
10) Rhinestones Basic Jewels
11) Linen Thread
12) Big Shot
Cardstock:
Black Cardstock
Very Vanilla Cardstock
Delightful Dijon Cardstock
Basic Gray Cardstock
Smokey Slate Cardstock
Cherry Cobbler Cardstock
Basic Card Assembly
All card bases are 5-1/2″ x 4-1/4″
All DSP (plaid & plain paper) are 5-1/4″ x 4-1/8″
Use Thinlits dies to cut out bow, pine branches and pine cones
Use Pine Boughs TIEF to emboss Delightful Dijon card base
Embellish as desired!  Enjoy making these beautiful cards.
 PRODUCT LIST

WHAT’S GOING ON?
OCTOBER WORKSHOP: Saturday, October 29, 2016 12 Noon to 4 p.m.
Register Here: October Workshop
  • Check out the Paper Pumpkin monthly kit – subscribe today – click here: PAPER PUMPKIN

Click below to SHOP 2016 HOLIDAY CATALOG